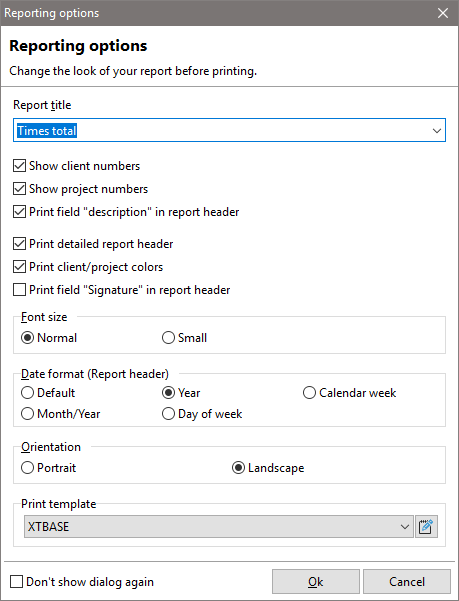
If you print reports in Xpert-Timer you have the option to edit the report header every time you print. You can also use the xperttimer.ini file in order to set certain fields. This is explained a bit further down.
The "detailed report header" includes your client name, project name, date range and the user, depending on what report you use.
Sometimes it's necessary to change the orientation of the print in order to get all the information printed in one line.
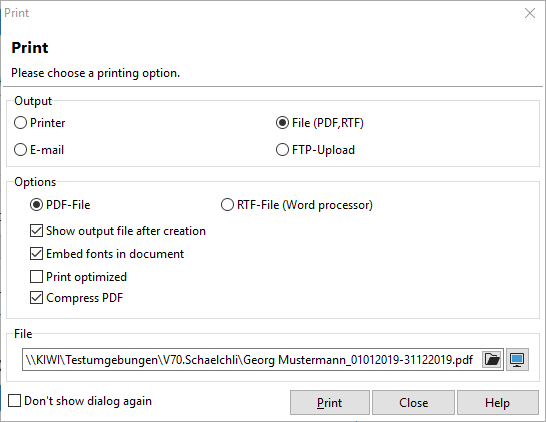
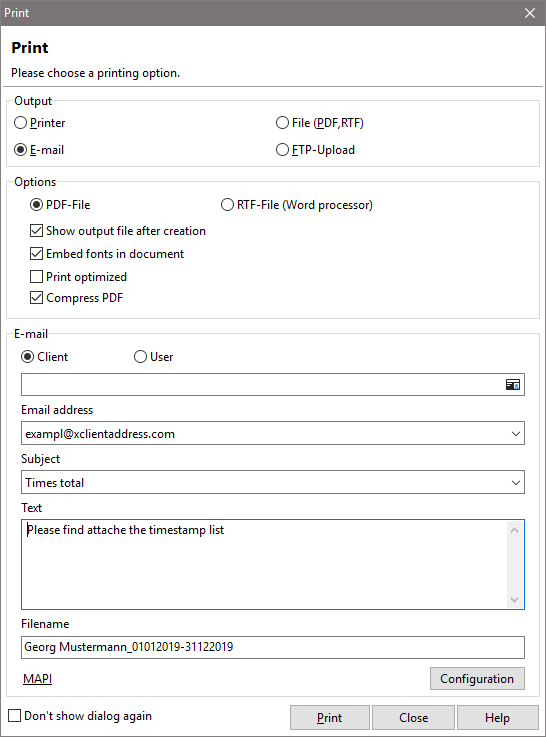
Xpert-Timer uses a special printing engine, that offers you to output your data in various kind of ways:
1.Print a standard document on your printer

2.Create a PDF or RTF-Document (RTF to edit the document in any Word processor afterwards)
3.Send an e-mail (with attached report) to notify people who might not have access to Xpert-Timer
4.Sending the reports to a FTP-Server on the Internet to have worldwide access to the reports and project lists by using an internet browser (like Internet Explorer or Firefox)

Individual settings for the report header using xpertimer.ini File
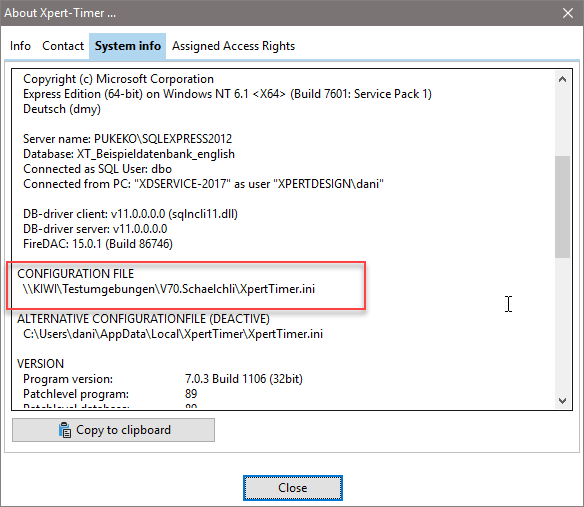
In order to change the information printed in the header of your reports, you can alter the entries in your xperttimer.exe. You can find the path to your xperttimer.ini file in your project manager pointing to Help -> Info -> System Info.
If you want certain, specific names for the reports, for example "Employee name" instead of "Name" on the report, you need to write this new description behind the "=".
For example:
[ReportOptions]
ReportHeader_User=Employee name
ReportHeader_Client=
ReportHeader_Project=
ReportHeader_DateRange=
ReportHeader_Filter=
the standard
for User the report displays: User, but instead of user, you want Employee name: to be printed.
for Client the report displays: Client
for Project the report displays: Project
for DateRange the report displays: Date range
for Filter the report displays: Selection
In case you want to change the title of the report, you can do so in the .ini file. The settings are for following reports:
- Timestamp list
- Task list
- User list
- Project list
- Client list
- History entries
For example:
[ReportOptions]
ReportTitle_Times=Overview of all recorded times
ReportTitle_Todo=To Do List - Current
ReportTitle_Users=
ReportTitle_Projects=
ReportTitle_Clients=
ReportTitle_History=