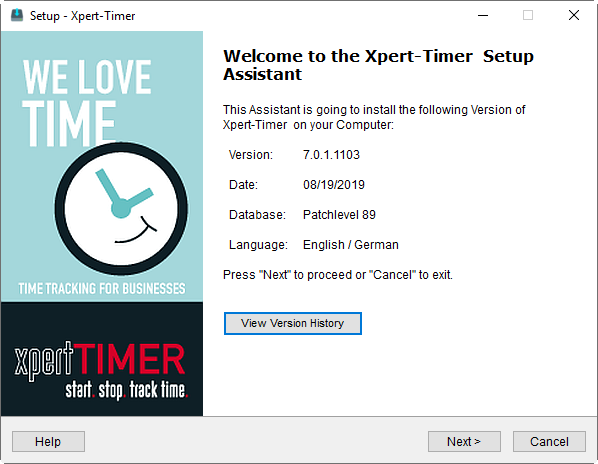
An installation wizard is available for your Xpert-Timer. You can decide, if you want to install the trial version, the full version or an update of your existing Xpert-Timer. Use the full version option if you own a license file and for example move from one computer to another.
Execute the file XTInstEN.exe and for Xpert-Timer Basic
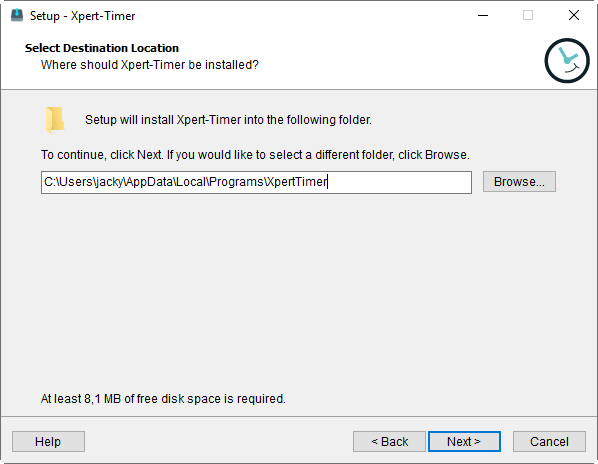
The wizard automatically checks, if there's an older version of Xpert-Timer installed on your system. The standard is set to install on your C://Programs(x86) directory. If you want to install Xpert-Timer in another directory, you can choose the directory accordingly.
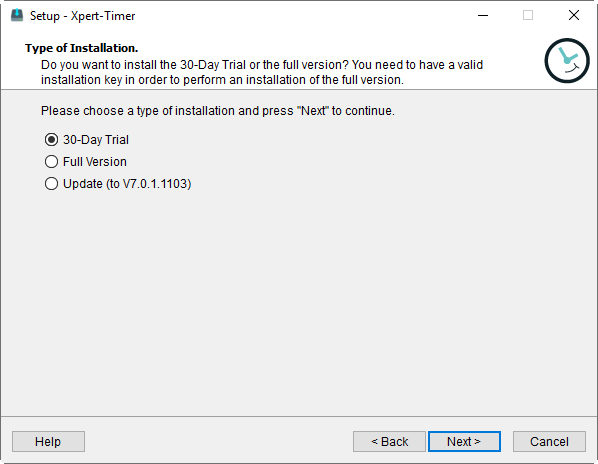
Choose your type of installation (30-Day Trial, Full Version, Update). If you've never installed Xpert-Timer on your system, choose the 30-day-Trial Version.
Go ahead and install the Full version if you own a license file and you needed to reinstall the program. This might be necessary if you switch to another computer, install a new operating system or similar.
If you've already got a version of Xpert-Timer installed, you can update it by simply choosing "Update". Xpert-Timer recognizes your installed version and updates automatically.
You can trial Xpert-Timer for 30 days. After those 30 days, you can continue using the data when you purchase a full license.
|
Xpert-Timer Basic is delivered with a SQLite database, but you can also choose to use the Access database. It will work, too. |
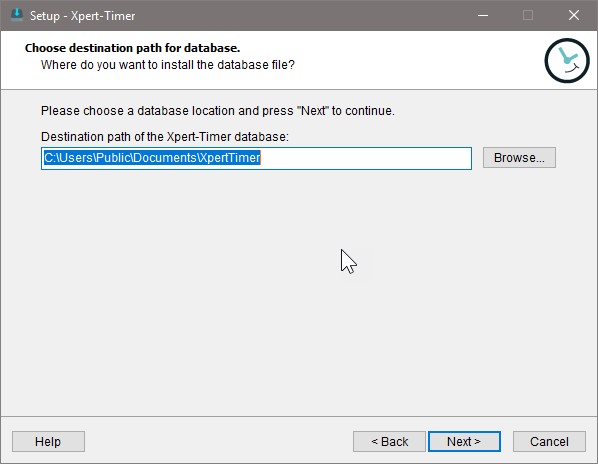
Enter the path where you want to save your Microsoft Access database. Make sure you have writing access to the directory, which is necessary using Windows 10.
You can fully test the Xpert-Timer for 30 days. After the expiry of the 30-day period, you can continue to use the data entered until then, if you decide to purchase the full version.
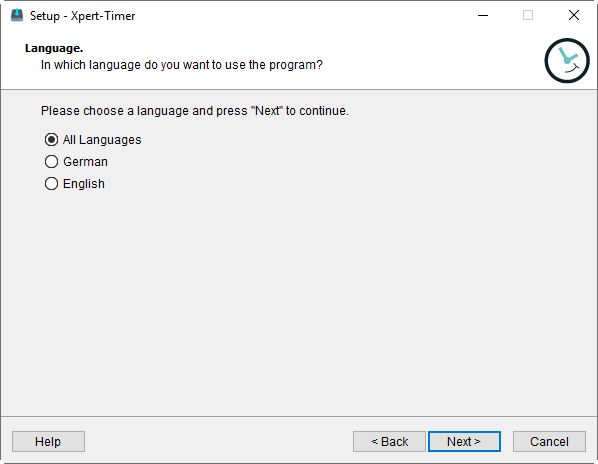
In the next step, you can choose the language of the program interface. In Xpert-Timer you can then select the appropriate language via the menu item "Program".
Language selection
Choose in which languages you would like to install the Xpert-Timer. The program provides you with a menu item for switching languages.
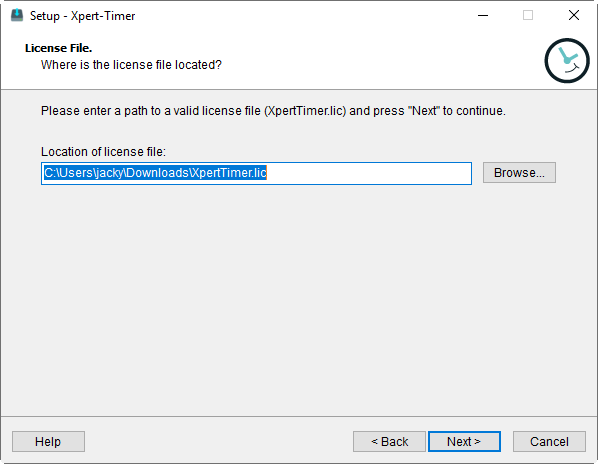
Path to the license file (When installing the "Full version")
If you install the full version of Xpert-Timer, you will be asked to enter the path to the license file. Hit Browse to find the file in your system and click Next. Please note, that you only need to activate the license file once, as the data is saved in your database. In a multi user environment you also only have to activate the license file once.
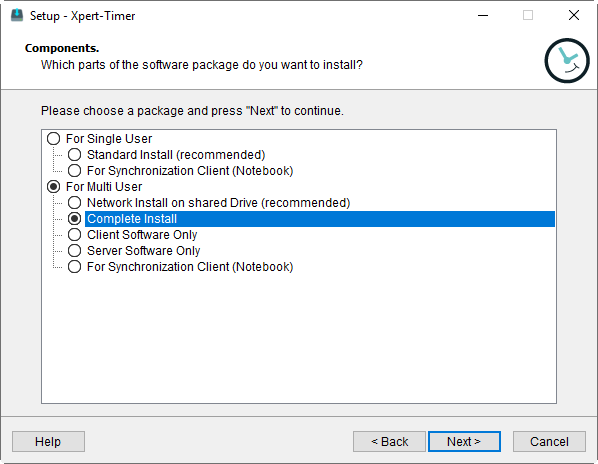
Components
In this step you decide if you want to install a single user version or a multi user version of Xpert-Timer. If you've chosen the trial period before, you'll be asked again later, if you want to test for multiple or a single user. This dialog is for the setup of the database.
The Multi User Complete install includes a Microsoft Access database as well as the administration program XTAdmin.
Use the Multi User Client software if you've got an existing Xpert-Timer database and want to install a version of Xpert-Timer on every single clients that connects to the database in the network. The easiest installation is to install a Client software to a network drive and have all clients link to the XpertTimer.exe. This makes it much easier to install a new update of the software.
If you haven't set up a database yet and you want to use a MS-SQL or MySQL database, use the setup for "Server software only". This will install the administration program XTAdmin on your Server and will help you to setup your database.
|
There's a free Microsoft SQL Express Version you can use Xpert-Timer with. Google for MS-SQL Express. |
For single users / Complete Install
A SQLite database will be created and you'll be connected to it automatically after you've installed Xpert-Timer.
For single users / For Synchronization User
Use this setup if you want to install Xpert-Timer on a laptop that serves as a Sync Client.
For Multi User / Network Install:
A Microsoft Access database is created and you should run this setup with the target directory on a network drive. The xperttimer.ini file is saved on the network drive as well, so all users access the database through the same .ini file.
For Multi User / Complete Install:
In case you want to install Xpert-Timer on every single computer or on a network drive, but save the xperttimer.ini file on every single computer, choose this setup. This setup also includes XTAdmin (Administration program).
For Multi User / Client software only:
This setup is used, to only download the XpertTimer.exe without the administration program XTAdmin. You can use this in case you want to install on every computer.
For Multi User / Server software:
Use this setup on your server to install XTAdmin.exe. This way you can create the necessary databases on your server. Xpert-Timer itself never needs to run on a server.
For Multi User / For Synchronization User:
Use this setup if you want to install Xpert-Timer on a laptop that serves as a Sync Client.
|
If you are not sure, what setup is right for you, go for the "For Multi User - Complete install". This includes all files you need. |
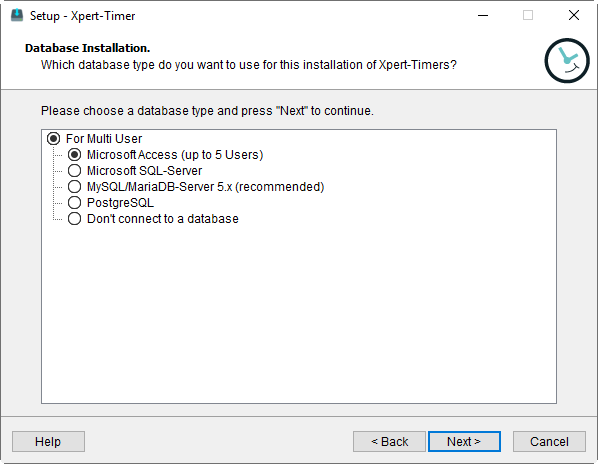
Installation of the database
In the multi-user version, you have the option of choosing your database format in the next step. Here we recommend the use of a MySQL database because of the much simpler installation compared to MS-SQL.
If you do not connect a database here, you can do this later with the administration tool XTAdmin.exe.
Select destination path
In the next step you specify the target path of the database. For SQLite, the database file is called: xt.sqlite and for Access: xt.mdb. Make sure you have full write permissions to the path. For example, with Windows 10, access to the Program Path is restricted.
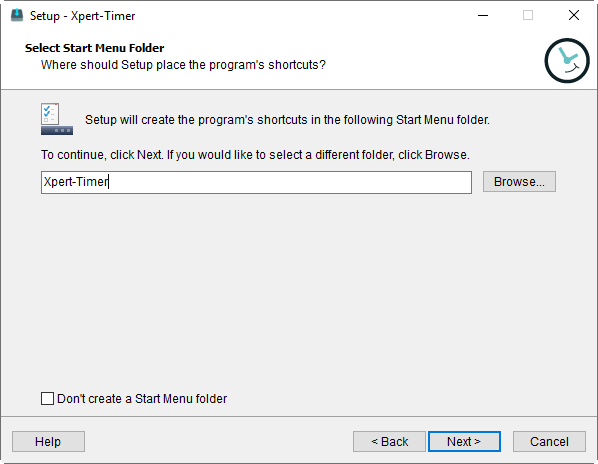
In the penultimate step, specify whether you want to have a shortcut to the Xpert-Timer in your Windows Start menu. We recommend this because it simplifies the launch of the program.
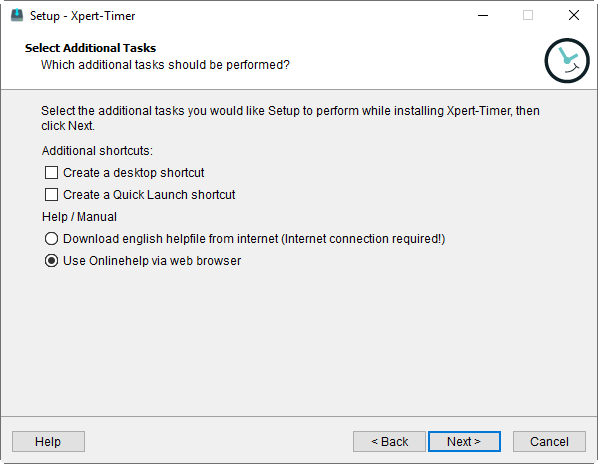
Now choose whether you also want to have a desktop icon and an icon in the Quick Launch bar. Again, we recommend doing so.
Our manual is available to you both in the online version on the Internet and in the offline version in the program. Decide which version you want to use.
The overview shows you all the data you have specified. Click Install to install the Xpert-Timer on your system.

Now Xpert-Timer is installed and can automatically start up when finishing the setup.
|
Hint |
|---|---|
Make sure your read the chapter "Tips and tricks"! |
|