In this report, you have influence on all areas in the print. Be careful not to change the SQL commands to prevent your template from working. As a precaution, make a backup copy of the working template before making any changes.
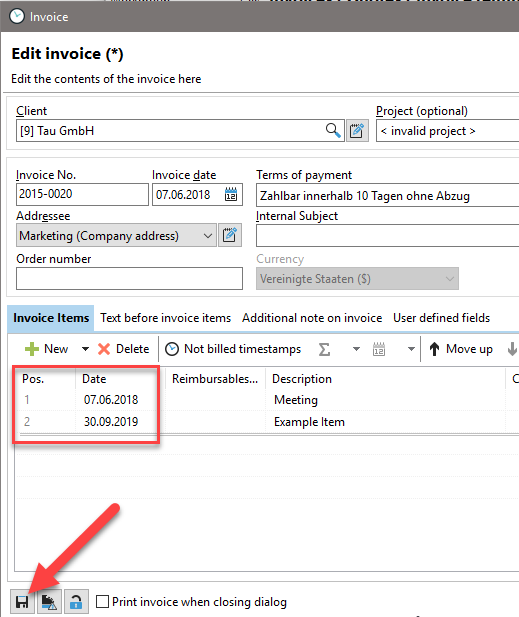
The best way to create a template is to test three bill items. Save the invoice and then click on "Edit template". This gives you data in your template and lets you test the look much better.
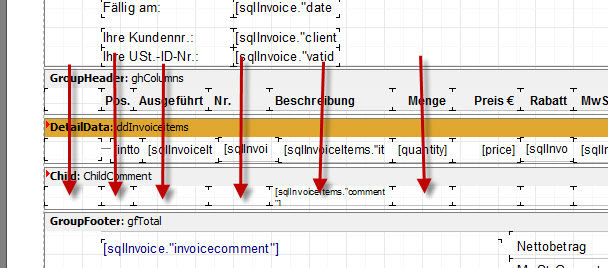
If you change column specifications, make sure that always every 3 rows are changed appropriately so that the data is still displayed correctly.
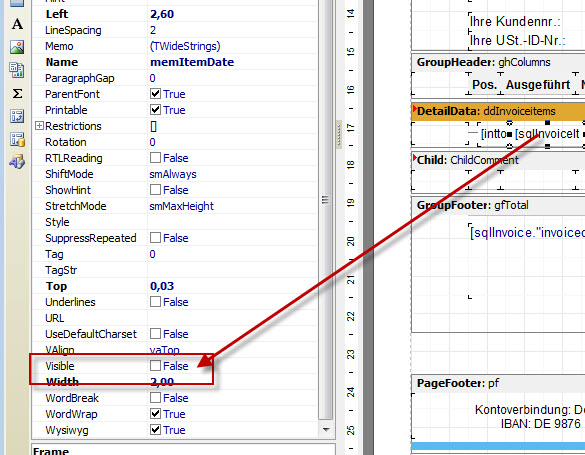
The data itself, so the SQL commands and data tapes should let you stand as they are. If you have a field, e.g. sqlinvoice. "discountpercentage" (discount) delete, you receive an error message, because in the tab "code" exactly this field is still addressed. It is better to set the fields you do not need to "Visible" -> False. This area is no longer displayed. Remember to set the corresponding area in all three lines to "Visible" -> False so that the layout will fit again when printing the invoice.
|
Hint |
|---|---|
The fields are still displayed in the preview of the FastReport. If you look at the preview from the invoice dialog of the Xpert-Timer, the fields are hidden as expected. |
|
You can change these by double-clicking on the labels.
Press F9 to view the preview and make any further adjustments.
If you change data, you may get an error message like this:
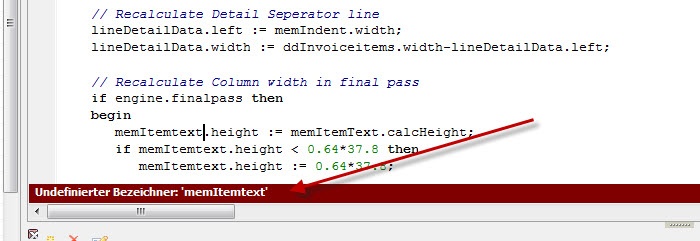
This means you have deleted a field in the template that is now inaccessible in the "code". Therefore, comment out the corresponding program line.
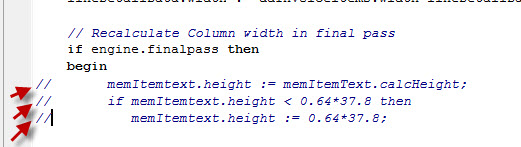
Press F9 again and comment out until you see your preview again.
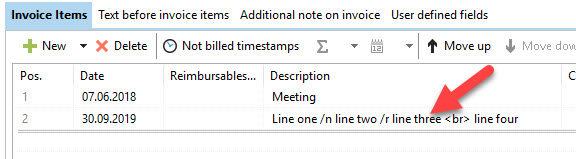
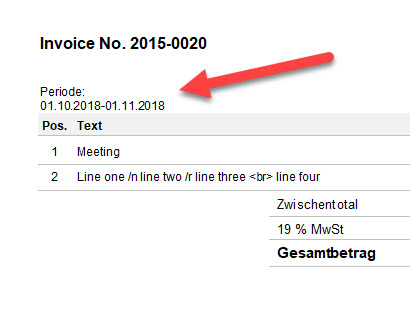
Line breaks in your bill text
You can now use the XTParseLinefeeds function to insert line breaks with the / n command. Enter the function here:
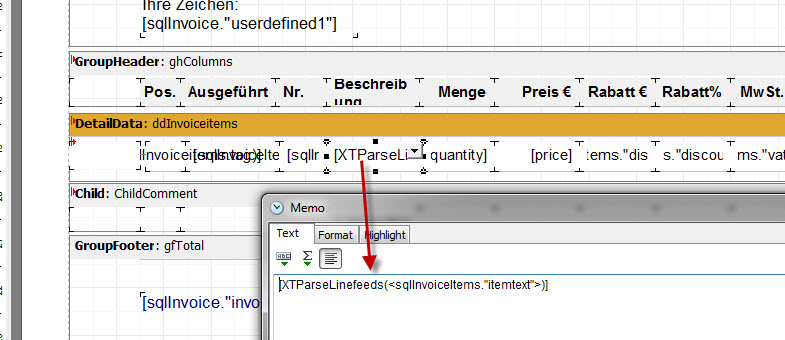
In the bill text, you must then specify the / n in the appropriate place in order to print the line break. / r or <br> also handles line breaks.
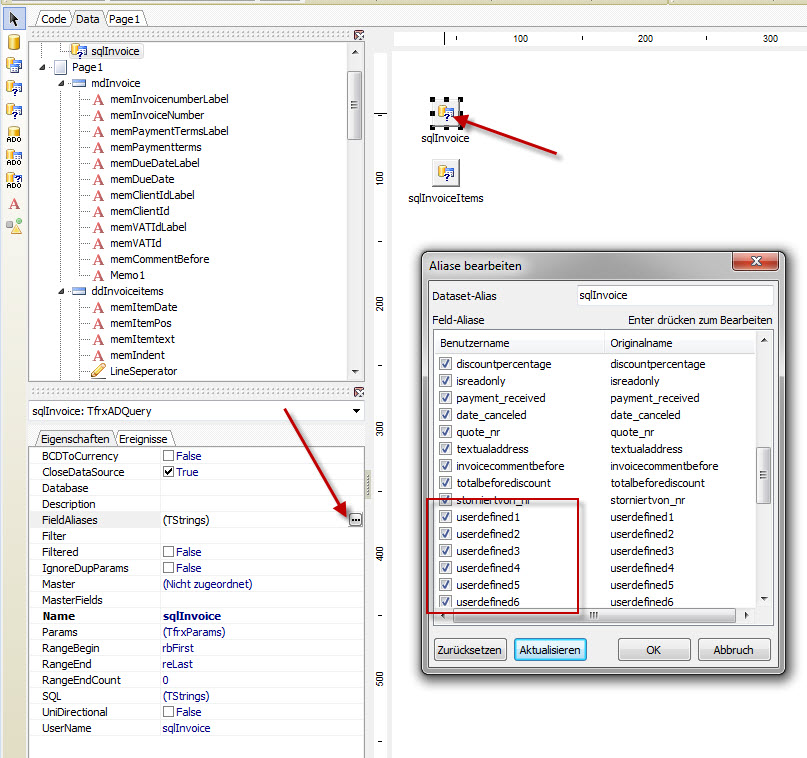
Include user defined fields
The invoice dialog contains user-defined fields for integrating with your invoice. These can be found in the "invoices" table. The columns are named accordingly: userdefined1 to userdefinded10:

To include these fields in your invoice template:
- Switch to the tab "Data". The SQL query "sqlInvoice" is available there. Just click on this query box to get the properties of the box. If you now click on the FieldAliases field in the properties, you should see the user defined fields. If not, click "Refresh". Only when your user defined fields are listed here are they also available in the report.
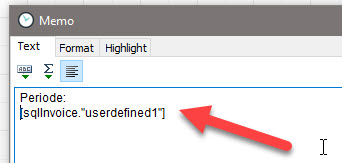
In the next step, you now enter a text field in the "Page 1" tab by clicking on the Marker text box. Then click again at the point in your report where you want to display the custom field. Double-click the field to enter data and enter [sqlInvoice. "Userdefined1"]. Of course you can do that with all fields from 1 - 9. Press F9 to check your adjustment.

You can also double-line the text field. Double-click again in your text box and adjust it accordingly:
Now the ad looks much better:
More tips for customization
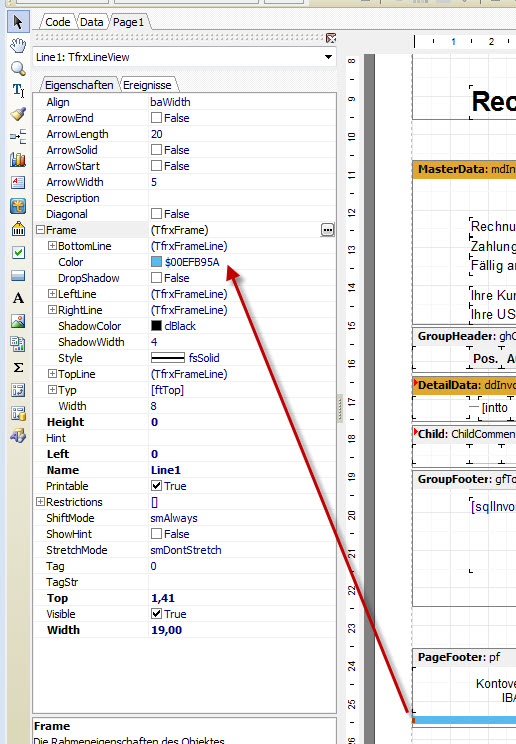
Each time you click on an object in the template, you will see the properties for this object on the left side. You can also adjust these accordingly.
The data itself, so the SQL commands and data tapes, should let you stand as they are. If you have a field, e.g. sqlinvoice. "discountpercentage" (discount) delete, you receive an error message, because in the tab "code" exactly this field is still addressed. It is better to set the fields you do not need to "Visible" -> False. This area is no longer displayed. Remember to set the corresponding area in all three lines to "Visible" -> False so that the layout will fit again when printing the invoice.
Save the template as XTINVOICE_ * to appear in your invoice templates.